Aligning, distributing and mirroring
The nine-button block in the left panel covers three separate jobs: packing the selected screens against one edge, spacing them out evenly, and mirroring the layout of a free-form screen. Buttons switch on according to how much is selected, so the block almost always looks partly greyed out — that is its working state, not a fault.
The button grid
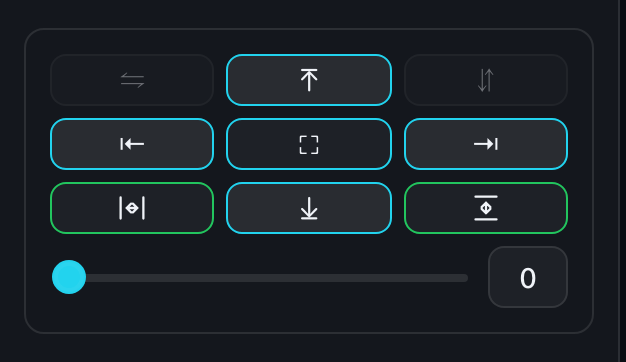
The block is a 3×3 grid. "Collect to the centre" sits in the middle, the four edges flank it, mirroring and distribution take the corners. The gap field with its slider sits underneath.
| Button | What it does | Enabled with |
|---|---|---|
| ⇤ ⇥ ⤒ ⤓ — left, right, top, bottom edge | Packs the selected screens together towards that edge | 2 or more selected |
| ⛶ — collect to the centre | Pulls the selection towards the centre of its own bounding box on both axes | 2 or more selected |
| Distribute horizontally and vertically | Leaves the end screens in place and gives the rest equal spacing | 3 or more selected |
| ⇋ ⇵ — mirror horizontally and vertically | Flips the cabinet layout inside a single screen | one free-form screen selected |
The "3 or more" threshold on distribution is not arbitrary: there is nothing to distribute between two screens — there is exactly one gap, and it is already whatever it is.
Aligning works per row, not to a single line
This is the key thing about the four edge buttons: they do not put every screen on one line. The screens are first split into independent groups — screens that overlap on the perpendicular axis end up in the same group (overlap in height for left and right, in width for top and bottom). Each group is handled on its own and knows nothing about its neighbours.
Inside a group the screens form a chain: the one nearest the target edge stays put as the anchor, and each next one butts up against the previous. So "align left" does not move the selection's own left boundary — it closes the gaps by pulling the screens leftwards.
Example: two rows of two screens
Four 2000×1500 mm screens in two rows — the top one at y = 0, the bottom at y = 3000, with a gap between the screens in each row:
| Screen | Row | X before | X after "align left" |
|---|---|---|---|
| A | top | 0 | 0 — its row's anchor, does not move |
| B | top | 3500 | 2000 — butted up against A |
| C | bottom | 800 | 0 — its row's anchor, pulled to the outer left edge |
| D | bottom | 4200 | 2000 — butted up against C |
Note C: it moved from 800 to 0 because it is the leftmost in its own row and travels to the selection's outer boundary. The rows did not mix — B never tried to queue up behind C, even though they were side by side on X.
If every selected screen overlaps in height they form ONE group and end up in a single horizontal chain, packed tight. That is expected, but it looks surprising if you were after alignment to a line — check that the screens really do sit in rows.
The gap
The field under the grid sets the distance between neighbours in the chain, in millimetres. It takes 0 to 100, the slider steps by 10, and the number can be typed in — where the two disagree, the number wins.
| Operation | Uses the gap |
|---|---|
| The four edge buttons | Yes — screens are placed that far apart |
| Collect to the centre | Yes |
| Distribute horizontally and vertically | No — the spacing there is computed |
| Mirror horizontally and vertically | No — the screen does not move |
In the same two-row example a 500 mm gap puts B at 2500 rather than 2000 — exactly A's width plus the gap.
Collect to the centre
The middle button pulls the selection towards the centre of its own bounding box, horizontally first and then vertically. It has two safeguards: a screen never crosses the selection's centre line, and never travels backwards from where it already stood. Pressing it again therefore changes nothing, and screens do not slip through one another.
Even distribution
The two corner buttons space the screens evenly, the way graphics editors do it. The end screens stay where they are, everything between them gets equal intervals, and the screens keep their own order along that axis.
| Screen | X before | X after "distribute horizontally" |
|---|---|---|
| A | 0 | 0 — an end screen, does not move |
| B | 2600 | 4500 — landed exactly in the middle |
| C | 9000 | 9000 — an end screen, does not move |
The gap has no effect here: the interval comes from the free space between the end screens and the combined width of the ones in between.
Mirroring a layout
The two double-arrow buttons behave unlike the rest: they act on one selected screen and only switch on for a free-form screen. A plain rectangular screen has nothing to mirror — a symmetric grid looks identical afterwards — so the buttons stay greyed out.
Mirroring rearranges the cabinets within the screen's own bounding box: the screen itself does not move, does not change size and keeps its place in the project. Cabinet numbers stay as they were — these are the same physical cabinets, just in different places.
- ⇋ horizontally — the layout is flipped left to right;
- ⇵ vertically — top to bottom.
The typical use is a symmetric pair: build a staircase in free-form mode, duplicate the screen with Ctrl+D and mirror the copy. That gives you the opposite wing without assembling it again.
Inside free-form mode itself the align block is fully unavailable — the whole left panel is inert while you edit the layout. Mirror a CUSTOM screen on the canvas, after leaving cabinet editing.
A few more things
- Every operation in the block is recorded in history: Ctrl+Z restores the previous arrangement in one step.
- To select several screens, drag a marquee across empty canvas or Shift+click — see "Working on the canvas".
- Alignment uses the screen's visible footprint, so a rotated screen counts as the rectangle it actually occupies.
- There is no such block on a phone: it works on several selected screens, and no touch gesture exists for a marquee — see "The mobile version".