The editor interface
The editor window has four zones: what to add on the left, how to look at it on top, the wall itself in the center, and the settings of whatever is selected on the right. This page covers what sits where; the individual mechanics have chapters of their own.
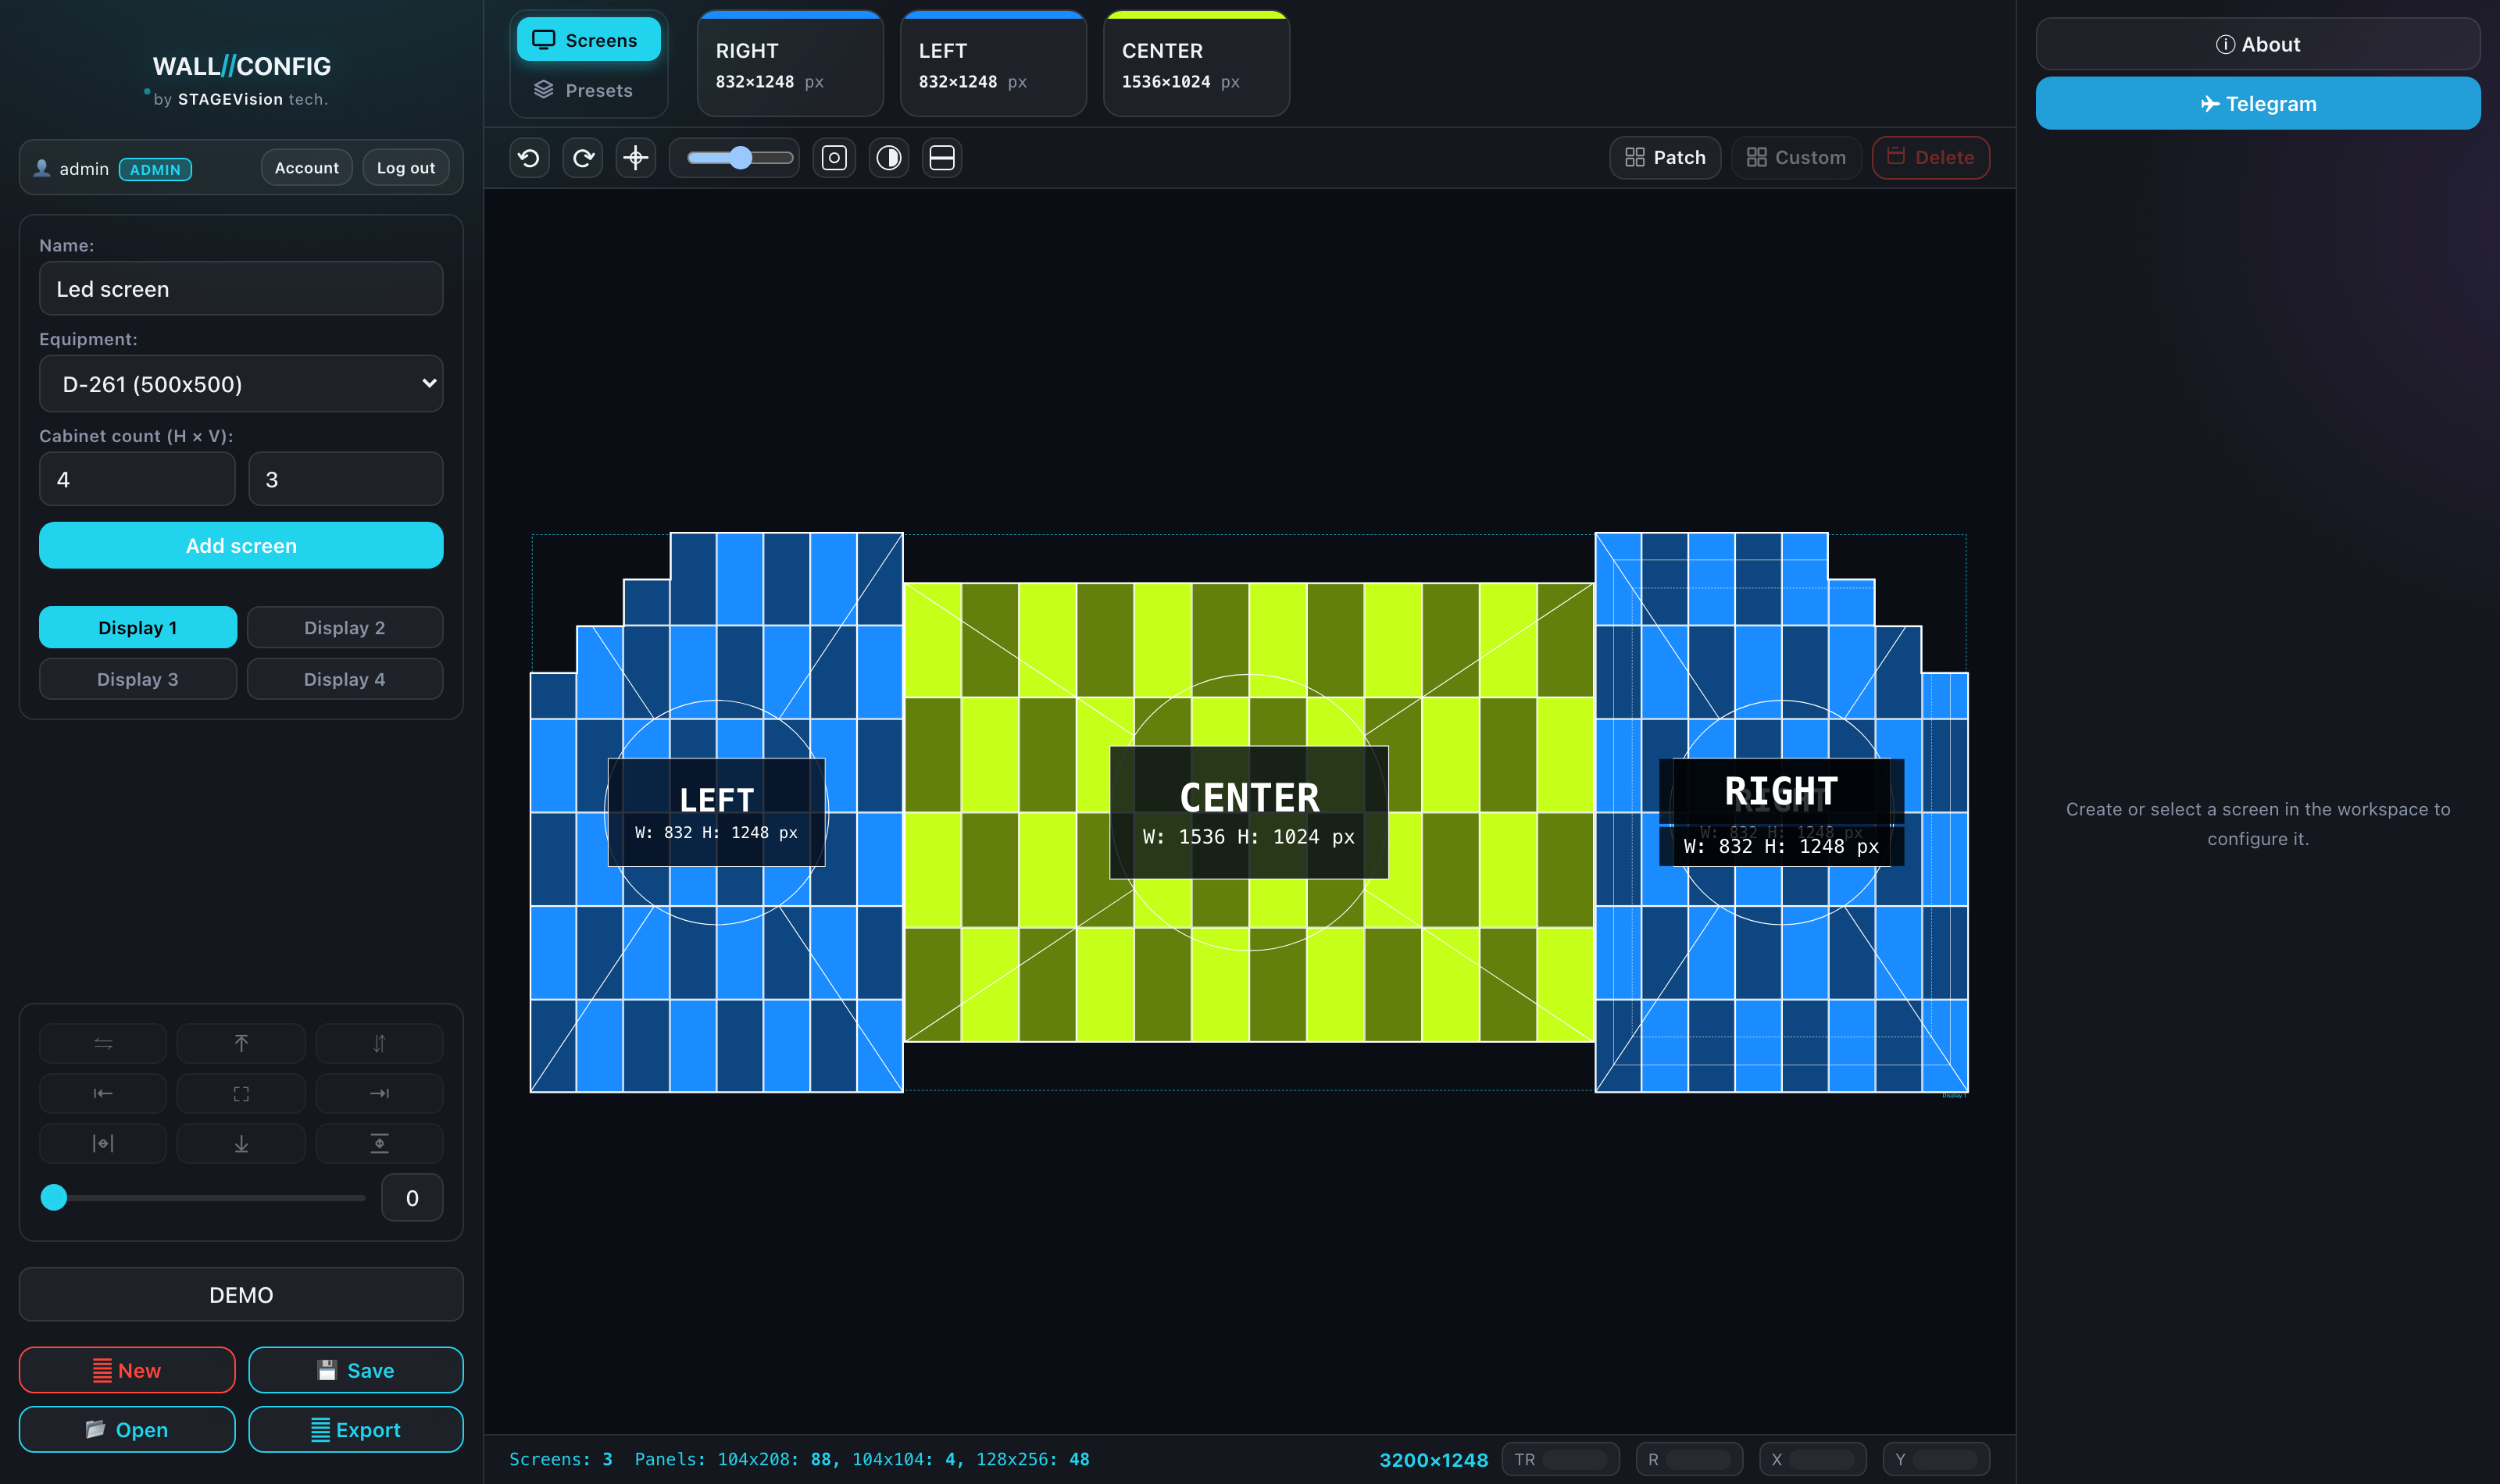
The left panel
The main panel for adding things. At the top is the "Add screen" form: cabinet model, layout, name. Below it the display switcher, the alignment block, the project name and the action buttons:
| Button | What it does |
|---|---|
| New | Clears the workspace. Asks for confirmation if anything is on the canvas. |
| Save | Saves the project to your account. Needs an account and a non-empty project name. |
| Open | Goes to your account, to the list of saved projects. |
| Export | Switches the editor into export mode. Clicking again returns. |
In export mode and in patch mode this panel is replaced by another — the list of formats or the list of processing cards.
The toolbar
It controls how you look at the wall and does not change the project — apart from undo and redo.
| Button | Action |
|---|---|
| ↶ and ↷ | Undo and redo, the same as Ctrl + Z and Ctrl + Y. |
| ⌖ fit | Frames the composition. A double click fits every display at once. |
| Zoom slider | From 1 to 200. A value of 100 is exactly what the "fit" button gives. |
| Grid | Snap to grid. Turning the grid on turns off the magnet to neighbouring screens. |
| Monochrome | Temporarily draws everything in black and white — for checking geometry and for print. |
| Clusters | Shows how cabinets break down into modules. |
The grid and monochrome states are remembered between sessions.
On the right of the same panel sit three quick actions on the selected screen:
| Button | Action |
|---|---|
| Patch | Enters port patching mode. |
| Custom | Enters cabinet editing mode: remove or restore individual panels. |
| 🗑 Delete | Deletes the selection from the canvas. |
"Patch" and "Custom" only appear if the mode is included in your plan. Both are the modes covered in the "Patching" and "Custom Mode" chapters.

In export mode the toolbar is locked — except zoom and the "fit" button, for the formats that show the live canvas.
The canvas and the footer
The central area is the composition itself. Under it the footer holds the counters: how many screens, how many panels broken down by resolution, and on the right the total resolution of the wall.
The fields of the selected screen live there too:
- X and Y — coordinates. They take arithmetic: type
900+200and get 1100. - R — the screen rotation. Clicking the letter "R" itself resets the rotation to zero.
- TR — the rotation of the label text, separate from the screen. Clicking "TR" returns the label to the screen rotation.

The right panel
The panel is contextual — it switches by itself depending on what is selected:
| When | What it shows |
|---|---|
| Nothing selected | A hint about what to do next. |
| A screen selected | Name, colors, outlines, layers — three tabs: "Screen", "Pattern", "Label". |
| A processing card selected | The card parameters and its port labels (in patch mode). |
| Export mode | The settings of the chosen format. |
The top of the panel always carries links to "About" (here, the documentation) and Telegram.
The card strip
Above the canvas is a strip of cards, one per screen in the project. A card shows the name and the resolution. With a card you can:
- drag it onto the canvas — placing a copy where you drop it;
- double-click — place a copy in the center of the visible area;
- single-click — select the screen on the canvas, or open its settings if it is not on the canvas yet.

To the left of the cards sits the "Screens | Presets" switch. In the "Presets" position the strip shows ready-made setting bundles applied to a screen in one click: "Presets".