Load, Mapper and the check
Three things separate a drawn scheme from a workable one: no port may be overloaded, the numbering must be readable on site, and the cards must not overlap.
Port capacity and load control
How many pixels one port can carry depends on the combination of card technology × refresh rate × color depth. An administrator sets these ceilings in a shared table, and the configurator reads them from there for every card.
As you assign cabinets the load adds up and is compared against the ceiling. An overloaded port is highlighted, and the bottom panel shows a load table across every port:
The panel collapses; its header shows either "ok" or the number of overloaded ports.
Where those limits come from, why they depend on color depth and how to enter your own measured values — see "Port load and card technologies".
The load is measured by the bounding frame, not by the sum of the cabinets. If one port's screens sit apart on the wall, the empty space between them falls inside the frame and loads the port too. That is not a miscalculation — it is how data transmission works.
If the table has no ceiling for a given technology, refresh rate and color depth, the port is treated as unverifiable and overload is not flagged on it. A blank cell must not retroactively mark every port of that technology as overloaded.
Mapper (installer) mode
Mapper replaces the route lines with a three-line label drawn on each assigned cabinet:
S:— the card number;P:— the port number on that card;#— the cabinet's position in that port's chain.
On site that label is what you check the cable you actually ran against the plan: card → port → position in the loom. The setting is remembered between sessions.
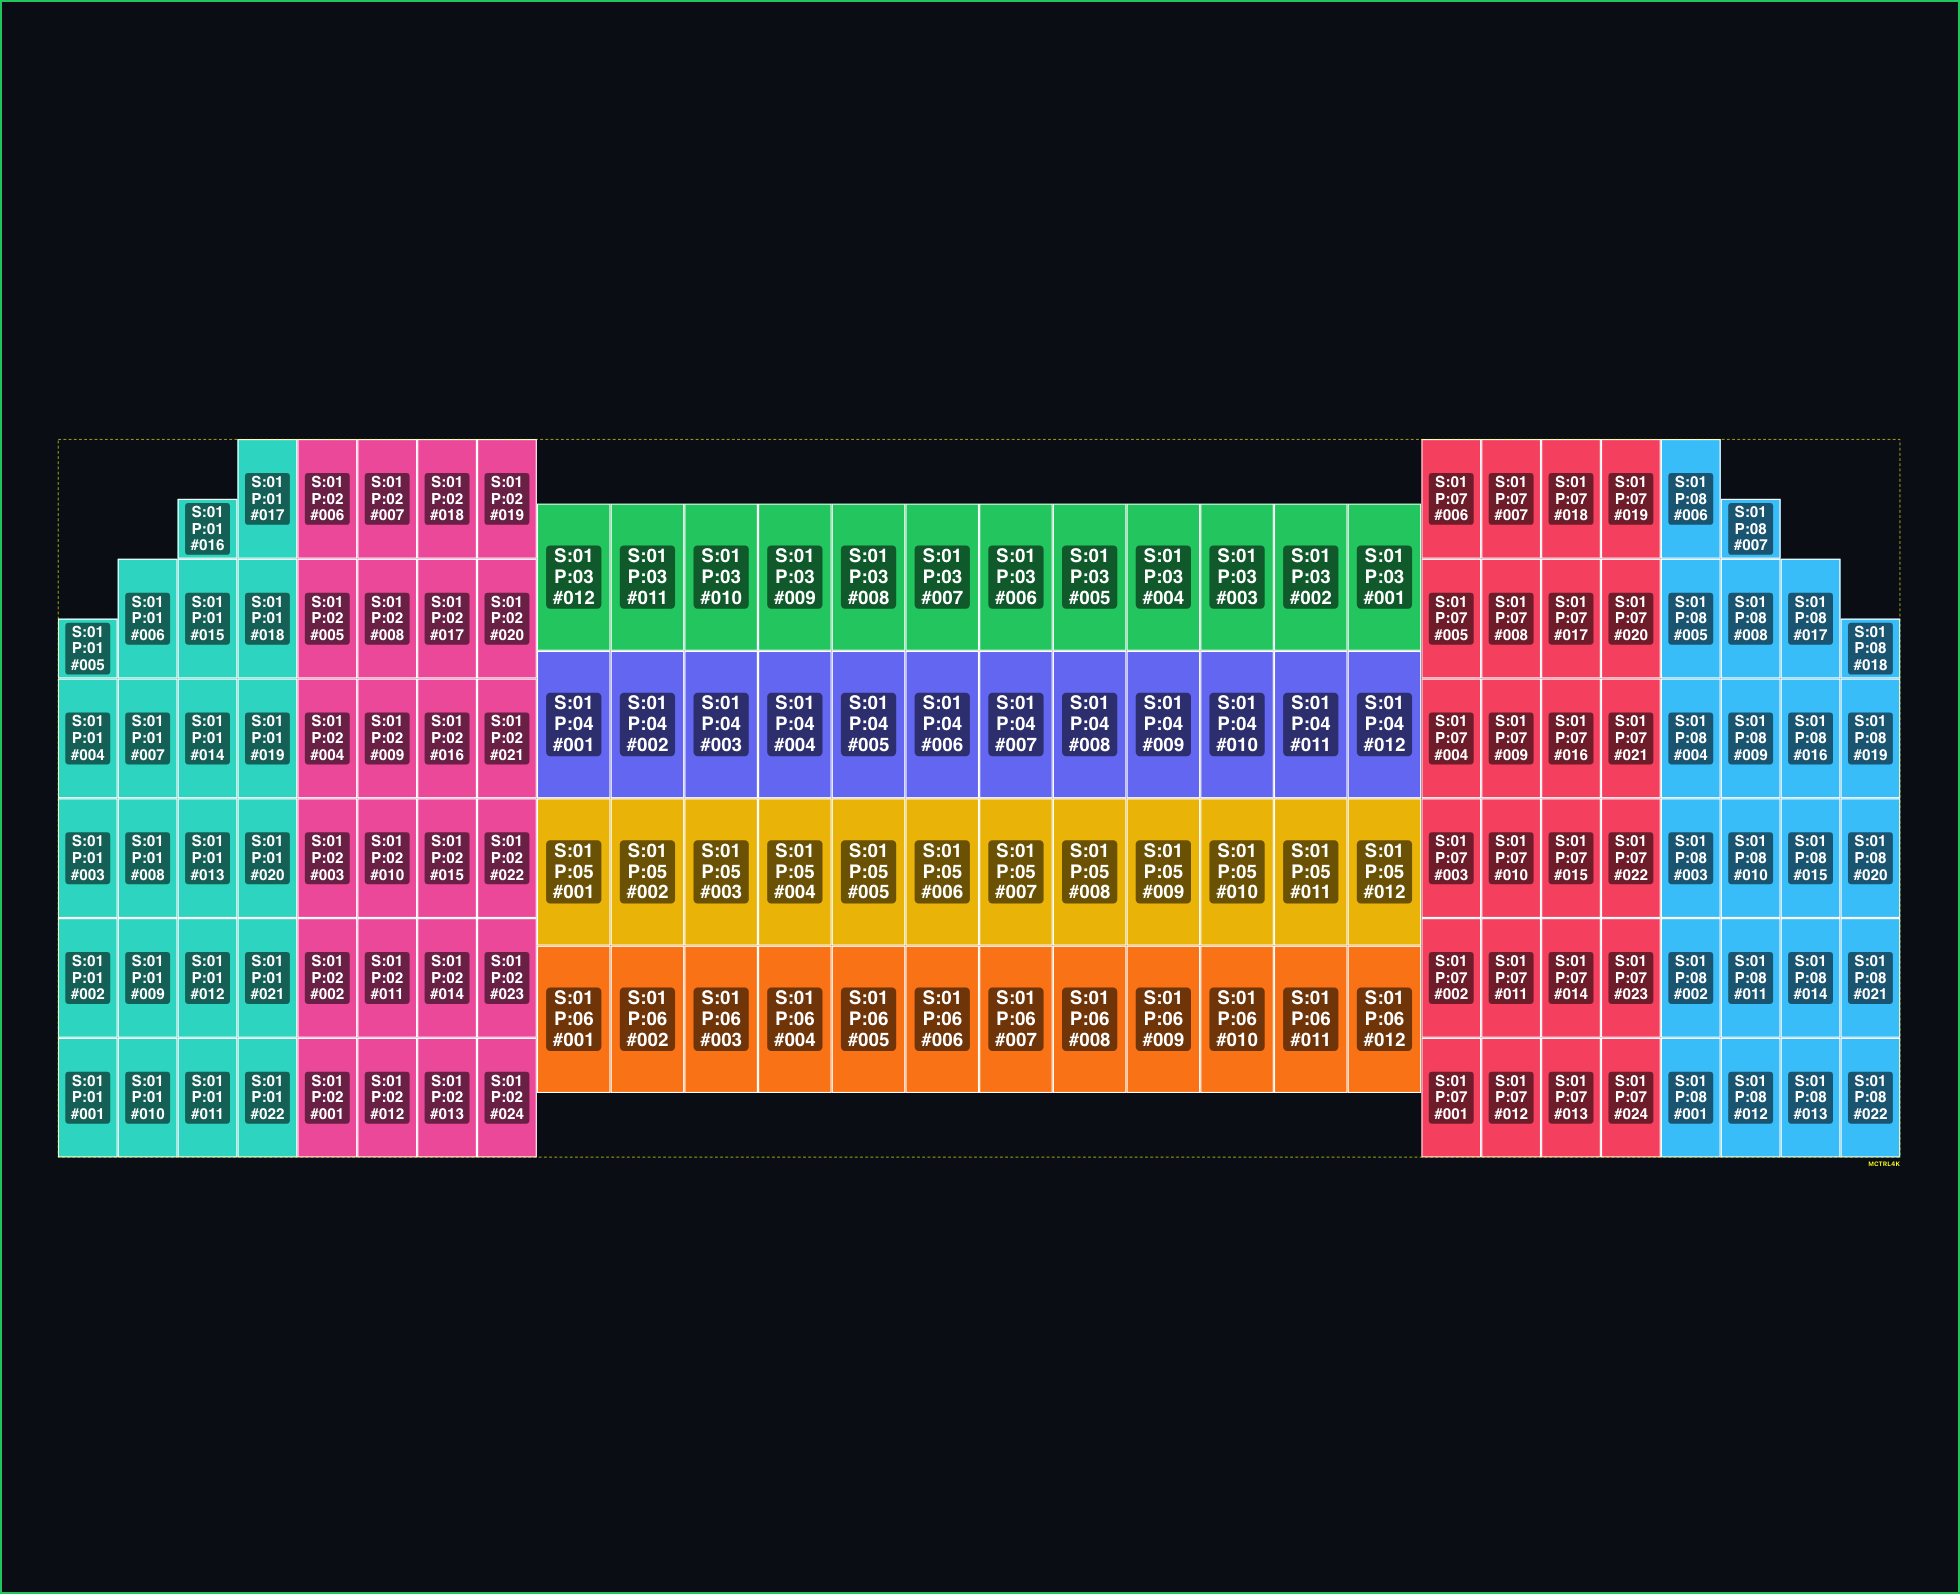
A separate patching layout
Inside the mode you can move screens — to pull apart blocks that sit flush, for instance, so the scheme reads. That is a separate layout; it does not affect the real composition of the project. The reset button puts the screens back where they stand in the editor.
A separate toggle controls whether cabinet rotation is taken into account when building a route — turn it on when some panels are physically turned.
The check before saving
Saving is blocked when the scheme is plainly unbuildable:
- two cards' frames overlap each other;
- two cabinets of the same card overlap.
Remove the overlaps and "Save" becomes available again.